whats the best way to soundproof a basement ceiling
A friend asked me if I had whatsoever recommendations for soundproofing their basement office ceiling. The dissonance of the kids and family canis familiaris makes it difficult to concentrate on piece of work or have a conversation with clients.
So what are the options for soundproofing a basement ceiling? To soundproof a basement ceiling, yous demand to:
- Decouple the ceiling from the joists
- Adding mass betwixt the upper floor and ceiling
- Absorb the sound
- Dampen the sound
- Reduce HVAC noise transfer
- Select sound reducing fabric
I'll explicate these 6 factors and include additional information for soundproofing your ceiling.

Why Do You Need to Soundproof Basement Ceiling?
A basement may be a storage area or added living space that improves your family'due south quality of life. Repurposing your unused space into a home theater, playroom, additional bedrooms, an office or even a workshop (or all of these) can allow your family to grow and enjoy your abode more.
People are walking or dropped items crusade bear upon dissonance that tin repeat throughout the basement. Conversations and Goggle box noises are barely muted between flooring levels, creating background noise that interferes with conversations and Boob tube elsewhere in the house. Reducing dissonance transfer betwixt floors is an important pace when turning your basement into usable space.
Soundproofing the basement ceiling is the all-time manner to reduce noise transfer from the basement to the rooms higher up and noise from above into the basement.
Sound can be airborne or touch on noise. An unfinished ceiling with exposed joists does little to reduce sound transfer. Yet, information technology does make information technology much easier to exercise a proper soundproofing job than a prefinished ceiling.
How are Noises Transmitted to and from the Basement?
When looking at soundproofing, it is essential to familiarize yourself with the three principal ways household racket travels. Y'all tin can then better determine how best to preclude racket from traveling into or out of your basement.
Airborne Noise
Sound waves travel through the airwaves, so airborne dissonance is any of the thousands of noises we ordinarily hear. Information technology travels through doorways, open windows, stairwells, hallways, and other open up spaces within a building. Airborne racket could originate from: conversations, radio or TV, vehicle noises, dogs barking or planes flying through the air, to name a few.
Mechanically Transmitted Sound
Mechanically transmitted sound is noise that travels through walls, ceilings, floors, the roof, and even the basis. When an airborne sound wave hits a solid construction, the wave becomes a vibration and is transmitted through barriers.
The technical term is Impact Isolation Course Transmission or IIC sound transmission. Mechanically transmitted audio can originate from: something dropping on the floor, an air-conditioner mounted to an exterior wall, a ball billowy off the driveway or a wall, the furnace, the plumbing, or other sources.
Flanking Dissonance
Flanking racket is sound that travels indirect paths from room to room or floor level to floor level. It can travel laterally through joists to other rooms, resonate through ductwork within a building, or vibrate through concrete floors. It can even reverberate around corners and through closed doors.
Proper soundproofing must accost all iii ways sound tin can travel through a building.
What are the Fundamental Basics of Ceiling Soundproofing?
The key basics for soundproofing a ceiling need to interrupt the paths sound can travel. If y'all but interrupt 1 path sound travels, then you may reduce some but not all sound transfer between floor levels.
How exactly should we soundproof ceiling?
To soundproof a ceiling, you need to block or absorb the airborne sound waves using added mass. Then you demand to interrupt the paths mechanical audio vibrations tin travel through joists and supports by decoupling the levels.
The about hard paths are those flanking dissonance can travel since they are indirect. Plan out interior basement walls, HVAC, and plumbing and utilize soundproofing materials that dampen or absorb sound, so yous interrupt the paths audio tin travel.
Here are the four chief elements of soundproofing:
- Decoupling: When you decouple you separate levels past creating a gap between the joists or studs and ceiling layers or other solid surfaces. The separation breaks the path audio wave vibration travels and is the all-time solution for noise transfer.
- Adding Mass: Sound waves are vibrations. If you increment the mass you lot make it difficult for racket to vibrate through. Unfortunately, information technology takes a lot of mass to make a departure. Adding a second layer of v/8" drywall will merely reduce the sound transfer by about 3dB; not much help if your teenager is strumming out "Bat out of Hell" at 100+dB!
- Absorbing: Although a fluffy pillow may seem to blot the sound of thunder, it doesn't mean that fluffy fiberglass insulation will. When yous compress that cream or feather pillow around your ears, you're making information technology denser. The denser the cloth, the meliorate it absorbs sound; heavy vinyl membrane, MDF (medium density fiberboard), or even drywall take amend ratings than regular fiberglass. However, insulation behind a heavier barrier will improve audio absorption.
- Damping: Damping is a way of preventing or reducing sound vibration in ceiling joists and wall studs. New viscoelastic compounds take been adult that subtract audio vibration transfer. Audio-visual drywall, for example, uses viscoelastic compounds to absorb and dampen audio waves and vibration and is much more effective than regular gypsum drywall.
Sound travels on airwaves, so the more than airtight, the meliorate; if air tin get through, then sound tin can besides. Acoustic caulking and foams are good for those hard to reach or cover spaces.
Quick Review of Soundproofing Basement Ceiling Options
Soundproofing your basement ceiling depends on what you begin with. A drywall ceiling makes it difficult to insulate in a higher place without removing all or part of it. A drop ceiling can exist removed and soundproofing the ceiling isn't also difficult. If your basement ceiling is unfinished, equally in the joists, ductwork, and plumbing are exposed, then soundproofing is fifty-fifty easier.
Options for Adding Mass
- Standard drywall: Standard drywall attached to the underside of the subfloor adds mass and will reduce some sound transfer. Using Dark-green Glue and adding a 2nd layer of drywall will greatly improve the sound blocking, merely is more expensive.
- Soundproof drywall: Attaching soundproofing drywall betwixt the joists will have a similar effect to a double layer of standard drywall.
- Foam Board: Polystyrene panels can be used similarly to the drywall layers between the joists. With an IIC (Impact Isolation Class) rating of 70, information technology can reduce mechanically transmitted sound and as well help to decouple the floor levels.
- Mineral Wool: Mineral wool panels or battens are denser than almost fiberglass products, won't slump like fiberglass, and will stay between the joists much better. It tin exist used to add mass betwixt the joists to ameliorate sound absorption and reduce impact vibration racket transfer. Acoustic mineral panels and battens are available.
- Fiberglass: Fiberglass battens are soft and fluffy, only not rigid enough to stay between the joists on their own, nor do they have the mass to be effective. They volition slump and reduce their soundproofing effectiveness, allowing more noise through. Rigid fiberglass panels are better than the battens and perform similarly to the mineral panels. Acoustic fiberglass battens and rigid panels are bachelor.
Options for Decoupling
- Viscoelastic Damping Materials: Using acoustic adhesives like Dark-green Glue or heavy vinyl membranes between the bottom of the joists and wooden furring strips is 1 option for separating the flooring and ceiling layers to foreclose mechanical noise transfer.
- Sound Isolation Clips with Metal Furring or Hat Channels: Audio isolation clips with metal furring or hat channels are presently the all-time way to decouple the ceiling from the flooring to a higher place. The isolation clips attach to the joists and have a condom flange to prevent sound vibration from traveling from one-flooring level to another. The metallic furring attaches to the prune, and the drywall or other ceiling fabric attaches to it. Information technology may exist the best way, but it is also pricy.
Other Options
- Green Mucilage: A noise damping chemical compound that helps reduce airborne and mechanical audio vibration.
- Acoustic Caulking: Can be used between layers or to fill cracks or spaces to prevent air movement.
- Spray Foam – Stuff information technology: Similar to the caulking, it will fill larger gaps or hard to reach spaces with dumbo air proof foam.
How To Soundproof Basement Ceiling – Step past Footstep Guides
Seal Gaps and Cracks Betwixt Floors
Before you brainstorm soundproofing and finishing the ceiling, y'all want to seal anywhere light peaks through to the basement from the floor above. If light can penetrate, then then can sound.
When it's night outside, light up the floor in a higher place, then go to the darkened basement and expect for any light leaking through from above. Recall to check around the door frame and under stairs depending on how your house is ready.
Some products that you may desire to have on manus for this are:
For patching nail or screw holes in drywall, 3M Patch Plus Primer iv-in-1 is all in one production has an applicator, putty knife, and sanding pad. The applicator contains a Spakle compound with a primer to make finishing quicker and easier.
Employ the Green Glue Noiseproofing Sealant to seal cracks, seams, wire holes, and other gaps that will channel noise from ane flooring to another, and room to room. The product remains pliable, so it won't compress or crack and allow racket through. It is also paintable.
To apply the soundproofing sealant tubes you demand a caulking gun. Some feature tip cutters and a punching tool to puncture the internal seal. Dripless models are besides available that automatically back off after being squeezed. Some are bachelor with padded grips or bombardment power.
1. Not Finished Basement Ceiling – Best of the Best
An unfinished basement ceiling is the easiest to soundproof, only that doesn't mean it's easy to do. There are also additional steps that you may want to add together before completing all the steps in soundproofing the ceiling. Also, are you doing the whole ceiling or just a section of the ceiling?
I'll explain each step in detail, but here's a quick list of the different steps or layers for getting the best soundproofing results:
- v/8 gypsum drywall strips
- Green Glue
- 5/8 gypsum drywall strips
- Air gap
- R19 fiberglass insulation or Mineral Wool insulation
- Air gap
- Resilient Sound Isolation Clip
- Resilient Channel
- 5/eight gypsum drywall
- Greenish Mucilage
- 5/viii gypsum drywall
The reason I believe this is the all-time option is that it addresses the iv elements of soundproofing. The airspace, insulation, and layers of drywall all work together to add mass and blot sound.
The dark-green glue is a viscoelastic compound for damping sound. Using the resilient clips and channel decouple the floor from the ceiling, prevent mechanically transmitted from moving betwixt the floors.
Pro Note: If yous're adding sectionalization walls to make rooms in your basement, plan ahead. You will demand wiring for receptacles, switches, and lighting that come through the floor joists and ceiling. You lot may likewise demand to address HVAC issues too. Most of these tin can be washed later on the two layers of 5/8" drywall strips, and green glue take been installed but should be washed before the rest is completed.
Pros:
- Ceiling decoupled from flooring joists.
- 2 gypsum layers on the underside of subfloor deaden echo in the upper floor and absorb sound going to the basement.
- Neat for reducing footfall transfer noise.
Cons:
- Time-consuming and repetitive
- Expensive
Soundproofing levels:
A ceiling finished with these materials will have an STC (Audio Transmission Class) rating of 76 and an IIC (Impact Isolation Class) rating of 64.
Price:
At that place are a lot of variables here, including your location relative to supplies. The square footage affects the costs. Buying a 5-gallon bucket of Green Gum is less expensive than a couple of dozen tubes of Dark-green Gum caulk.
Iv times the square footage of drywall will add upward, and your choice of R19 (or meliorate) fiberglass or mineral wool volition flex the cost. Additionally, resilient clips and channel are not inexpensive. Floor joists at 16-inch centers vs. 24" centers too have an impact on the textile costs and time.
If yous're doing the job yourself, the drywall, noiseproofing compound, and R19 fiberglass work out to approximately $3.27/sqft. The number of resilient clips and channels as well depends on the ceiling foursquare footage, and also the number of partition walls.
It volition toll about $500 for every 400 square anxiety. Knowing this, a 1600 square human foot basement well cost about $7200.00 to soundproof in this fashion.
Installation Process
The ease of installation will depend on how the joists are laid out, the type of joists, and how services and utilities are run through and between joists. Every basement ceiling is unique. Employ your store vac to clean dust, bugs and cobwebs from the subfloor and joists.
Stride 1: Install 5/8 drywall strip under the flooring
Measure the spacing between the joists – it should be the aforementioned but experience tells me it isn't. If y'all can fit and handle 8-foot strips of drywall, then do. The fewer seams, the improve, and the tighter the fit, the meliorate likewise.
Cutting the commencement layer of drywall. You can try dry fitting, but information technology may be quicker and easier not to. Spread a layer of damping compound evenly over the confront that goes confronting the subfloor. Bending it upwards into identify, you may want to employ a length of two×4 and a hammer to ensure information technology is affluent to the subfloor. Spiral the drywall to the subfloor.
Note: Green Glue is NOT a glue, and so yous need to crew the drywall to the subfloor! It is a viscoelastic compound that improves sound damping.
Step 2: Install second drywall strip
When installing the second layer of drywall, make sure the articulation seams don't line upwardly with those of the first layer. Mensurate and cut, then evenly glaze one face up with green gum. Bending it into place, use the 2×4 and hammer if necessary. Screw information technology into place using a pattern that doesn't line upwards with the screws in the outset layer.
Step iii: Apply green glue to the 5/8" drywall strips
If you are using the green glue in caulking tubes, utilize with an "S" blueprint and utilise a drywall putty knife to spread it evenly. If you accept the 5-gallon bucket, drop blobs and evenly spread it over the surface.
Step 4: Install Rockwool Acoustic Mineral Wool or R19 Fiberglass Insulation
The spacing for your flooring joists dictates the size of battens you utilise. Y'all want to leave a gap between the drywall strips and the battens to aid trap sound. There should as well be a gap beneath the battens and higher up the finished ceiling for the same reason.
Cut with a utility or long bladed knife-saw and push button into place. At that place should be no end gaps.
Note: Before installing the insulation, make sure you have all the wires, utilities, HVAC, and lighting in identify.
Utilize R19 rated fiberglass insulation or equivalent mineral wool insulation. Both are half dozen-i/iv" thick and work well to deaden and absorb sound.
Fiberglass insulation may be less expensive, tin reduce the STC (Audio Manual Class) from 35 to 42, and has an NRC (Racket Reduction Coefficient) of one.05. Even so, it will slump and compact over time, reducing its soundproofing qualities. Yous volition also demand to support the fiberglass, so it doesn't fall out. It cuts with a utility knife
Mineral wool insulation is slightly more expensive than fiberglass, but will compression fit between the joists (if 12" to 16" centers need support if 24" centers), and save fourth dimension and frustration. Roxul Safe'northward'Audio is R22, has an STC of 45, an NRC rating of 1.05 and an SAA (Audio Absorbing Average) of 95%. It is much denser than fiberglass, has a higher IIC rating/inch thickness than fiberglass, and also a higher fire resistance rating.
An alternative to the batten insulation is Rockwool Acoustic Insulation lxxx. It is a rigid two'x4'x2" console that can be cut with a knife or saw. The eighty has a density of 8 lb/ft³, STC of 52, NRC of i.0, and will significantly reduce impact noise.
Safety Recommendations: when opening, handling, cutting, and installing fiberglass or mineral wool insulation always wear safe glasses, a mask or respirator, and gloves. Both types of insulation have particles that go airborne as presently as you lot open the packaging.
Step five: Install Resilient Sound Isolation Clips
Isolation clips attach to the joist and human activity to block noise vibration and impact noise between floors. The clips have a rubber shank washer or bushing that prevents structural and vibration dissonance manual.
Infinite the isolation clips at every other joist 32" to 48" apart, or follow the manufacturer's instructions. They should exist aligned for the hat or resilient aqueduct and spaced to support the edges and middle of the gypsum sail.
Step vi: Install Resilient Channels
Hat or resilient channels are thin metallic furring strips that have a lid like profile. When combined with the isolation clips, they significantly reduce racket and impact vibration between floors. The flange adds ane/two″ to the ceiling depth, and is wide enough to adhere the edges of 2 drywall sheets.
When installing the channel on the ceiling ensure that information technology doesn't touch a wall since that will permit sound to transfer between floors.
Pace 7: Install First Layer of five/8 gypsum drywall
The type of drywall y'all select for your project makes a pregnant difference in the costs and soundproofing of your ceiling. The best option is a soundproof/acoustic drywall or QuietRock, only at $45.00 for a v/eight"x4'x8' canvas, information technology'due south more than triple the toll ($11.97 Usa) of Firecode core sheetrock.
Install the first 4'x8' layer of drywall using i-one/4" drywall screws into the furring strips. Brand certain to leave a 1/four″+/- gap between the drywall and the building walls.
Footstep eight: Seal the Seams with Green Glue
Use a Green Mucilage soundproofing caulking to seal all seams between the sheets of the outset layer. This will ameliorate the sound barrier by preventing noise waves from finding a gap.
Pace 9: Apply Dark-green Glue on Second Layer of Drywall
Apply an fifty-fifty layer of acoustical caulking to the side of the gypsum sheet that will attach to the layer you just installed. The thin viscoelastic blanket can improve impact isolation by 5dB to 10dB. Recollect, this isn't a gum or adhesive, and so you do demand to employ screws.
Step 10: Install Second Layer of Drywall
Install the second layer like to the first, just off-set up end and side seams to maximize the dissonance transfer barrier. Outset with a 2'x4' slice of drywall and then the seams don't match upward. Brand certain no ceiling drywall touches the basement walls likewise!
Step 11: Seal the Perimeter with Noiseproofing Compound
Use a paintable soundproofing caulking to seal the gap between the ceiling and the walls. The noise proofing sealant stays pliable, so prevents dissonance and vibration from flanking all the soundproofing piece of work.
2. Unfinished Ceiling – Best Value
If you're interested in reducing sound and impact racket transmission, but don't desire to remortgage the house, the following may be your all-time selection. It reduces near of the noise transfer betwixt floors but doesn't diminish the rebound noise or echo in the upper floor from bear on sounds generated on that flooring.
Hither'due south a quick list of the steps or layers for getting the best value for your soundproofing dollar:
- Main floor
- six-inch air infinite
- 6-inch R-19 fiberglass or Roxul insulation
- Sparse or no air gap
- Furring strips – wooden or metal
- 5/8 gypsum drywall
- Dark-green Mucilage
- 5/8 gypsum drywall
Calculation insulation to the joist cavities helps to absorb the movement of sound. Using wooden or metallic furring strips provides a more than level surface than attaching the drywall directly to the joists.
Applying acoustic tape or caulking to the joists where the furring strips will adhere, helps to isolate noise from above. The two layers of five/8" sheetrock aid to deaden repeat in the basement and absorb sound. The layer of acoustical caulking adds a viscoelastic layer to reduce or prevent vibrational dissonance transmission.
Pros:
- Reduce the sound traveling between floor levels.
- Absorbs sound and deadens echo in the basement.
- Helps isolate vibrational noise between floor levels.
Cons:
- Time-consuming.
- It doesn't improve audio quality on the primary floor.
Soundproofing Levels:
Finishing a ceiling in this manner and with these materials will give yous an STC rating of 66 and an IIC rating of 56. The unfinished ceiling began with an STC rating between 32 and 35, so a definite improvement.
Toll:
If this is a DIY project, and so your labor isn't included. Drywall, soundproof caulking, and R19 fiberglass insulation work out to around $1.90/sqft. A 1600 sqft basement using this choice would price nigh $3032.00.
Wooden furring strips would add $200 while metal furring strips add together $440.00 to the price of the option, making it about half the toll of the All-time of the Best.
3. How to Soundproof a Finished Basement Ceiling – Cheapest Option
It is more difficult to soundproof a basement ceiling if it is already finished with drywall. The removal and resulting mess of tearing the sheetrock down and starting over, to say nothing of the expense, are a big deterrent.
If the original drywall ceiling was fastened direct to the joists, information technology would provide minimal low-frequency isolation and sound transfer. Hopefully, the ceiling was strapped offset, which adds to the IIC value.
Calculation a new layer of 5/8" gypsum sheets to the existing ceiling is the cheapest option. It will add mass to the ceiling and aid reduce sound transfer between floors and some echo within the basement.
Pros:
- Added mass to the ceiling will reduce sound transfer
- Absorbs more than sound than 1 layer
- Cheap soundproofing solution
Cons:
- No decoupling between floors, then sound wave vibration travels between floors
- Minimal audio absorbing or damping
Soundproofing level:
There volition be some improvement in audio quality in the basement and reduction of sound manual between floors. Information technology may be all you want or need. The added layer of drywall will improve the STC value to around 38. The IIC rating improves marginally to nigh thirty only also depends on the type of floor to a higher place.
Cost:
The cost of adding a layer of 5/viii" sheetrock to your basement ceiling is about 37-cents a square pes for the DIYer. For a 1600 sqft ceiling that works rounds out to $750.00 including screws, mud and tape.
4. Finished Ceiling – Amend Soundproofing
To better soundproof your finished basement ceiling, add a layer of acoustical sealant and so another layer of five/8" drywall. The sealant is viscoelastic material and volition create a sound vibrational barrier and assist with damping sound through the ceiling from the floor to a higher place.
Pros:
- Green glue layer helps clammy transfer noise through the ceiling
- Volition add some mass to reduce sound movement
- Absorbs more sound vibration and racket
Cons:
- Does not decouple the ceiling from the floor above
- Non enough mass to decrease much noise transfer between floors
Soundproofing level:
The use of soundproofing caulking volition improve the sound quality in the basement and reduce noise between the floors. The added layer of drywall, plus the noise proofing sealant volition improve the STC rating to between 41 and 45, depending on the flooring used on the above floor. The impact rating also improves to 34.
Cost:
The DIY cost for this ceiling depends on how you buy the soundproofing sealant. v-gallon pails are much less expensive than buying 5-dozen x-ounce tubes of caulking. The 5/8" drywall, plus screws, mud and record piece of work out to near $0.47 a square pes.
The green glue in the 5-gallon pails is around $ane.25/sqft. The approximate cost to do a 1600 sqft basement ceiling would be $1,750.00.
5. Finished Ceiling – Good Soundproofing but More than Expensive
To become the best soundproofing without fierce out the existing sheetrock ceiling add together sound isolation clips and metallic furring or hat channels to the existing ceiling. So add two layers of drywall with green glue spread betwixt them. This process decouples the ceiling from the flooring in a higher place, adds mass and damping which improves the sound absorbing quality of the ceiling.
Pros:
- Decouples the ceiling from the floor in a higher place reducing sound vibration transfer
- Added mass absorbs more than audio
- Viscoelastic layer reduces echo and improves audio quality in the basement
Cons:
- Doesn't reduce flanking dissonance
- Expensive
Soundproofing level:
Decoupling the ceiling from the floor above is the best way to prevent audio movement betwixt floors. Combining the decoupling with the two layers of gypsum capsule and the noise sealant significantly improves the sound quality in the basement. The STC rating jumps to 55 and the IIC to around l.
Toll:
The bound in the STC rating doesn't come cheap; the cost of soundproofing besides jumps. The double layer of drywall is about $0.94/sqft, the green glue around $1.25 per square human foot, and the audio isolation clips and hat channels for nearly $500.00 to practise 400 sqft. For a 1600 foursquare foot ceiling, the cost works out shut to $five,500.00.
How to Soundproof a Drop Ceiling in Basement
Soundproofing the basement ceiling should improve the sound quality in the basement and in the rooms higher up. A drib ceiling has some acoustic properties that reduce the motility between floor levels. It is likewise easier to add together mass and audio arresting cloth to improve its noise reduction ability than soundproofing a finished drywall ceiling.
Acoustical Ratings for Ceilings
Ceiling tiles are often rated for soundproofing in ii ways. The NRC identifies the amount of sound a tile material reflects or absorbs. The Ceiling Attenuation Class (CAC) rates products on how well they cake sound manual. A rating of 35 or higher identifies a high-functioning sound-blocking tile.
Decoupling
Nigh drop ceilings are made upwards of tiles sitting in a frame suspended below the joists of the flooring above. The suspended frame essentially decouples the ceiling from the floor higher up, preventing audio vibrations from traveling from i floor level to another.
Adding Mass
Adding mass to your ceiling volition absorb racket and vibration, improving the quality of sound in the basement and the flooring higher up. Replacing the ceiling tiles with a denser tile material or inserting dense plates above your existing tiles will add mass.
Absorbing Audio
The tiles may absorb or reflect some sound, but the empty infinite to a higher place the tiles and below the subfloor, betwixt the joists, becomes a resonating box for noise. The vibration volition travel from i flooring to the other.
The easiest mode to prevent this is to fill the space between the joists with half dozen-inches of fiberglass or mineral wool. It volition absorb the noise vibration and prevent it from moving from floor to floor.
Fixtures and Mechanical Systems
No matter how well you soundproof the ceiling, vents, ductwork, lighting fixtures, and other electric and mechanical systems can negate everything. Sound and audio vibration volition travel through all of these.
There are sound-blocking covers for electrical boxes and fixtures, acoustic baffles for ducts and vents, sound-damping paints and wraps for inside and outside ducts, and even insulated flexible ducts to reduce audio transmission and flanking noise.
Additional Steps for Amend Soundproofing
There are other ways that you tin can improve the soundproofing and sound quality of your basement and the rooms in a higher place. Here are some suggestions:
Lay Down Carpets, Rugs or Mats on the Start Floor
 Carpet and underlay are good ways to absorb sound. If used in the upper floor they will reduce impact dissonance and vibration that would disturb the rooms below.
Note: For more than on soundproofing the floors above rooms in the basement, please see our article Best Soundproof Underlayment.
Used on any floor, rug and underlay also reduce the echo within rooms and absorb sound improving listening quality within those rooms. Acoustic mats and underlay are too available.
They are designed to help isolate noise vibration in high traffic areas such every bit kitchens, hallways, and stairs.
Doors
No matter how soundproof your walls and ceiling, the weakest link is the i that leaks. A doorway is a 20 sqft hole. Filling it with a hollow core door is useless; a wool blanket would be better! The denser the door, the better it works.
 Solid cadre MDF doors are less expensive than solid cadre steel or wood doors and work only as well. Smooth flat doors are amend than recessed colonial style doors as well.
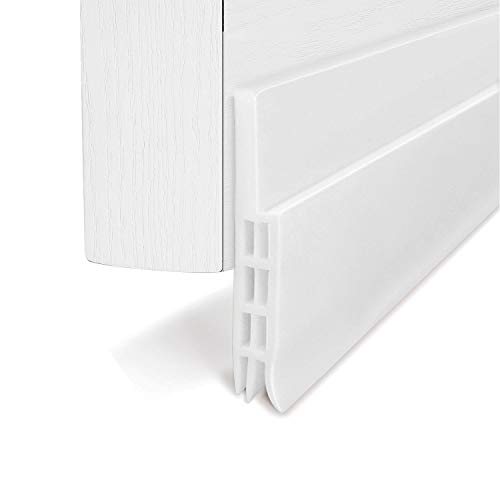
Adding cream tape around the door jamb volition also reduce vibration noise and transfer, helping to prevent audio going in or out of a room. To reduce flanking noise under a door, use a weatherproof under door draft blocker. If it stops the air current, it will cease the racket.
Note: An airtight room may prevent audio movement, only it can also brand you ill or suffocate you lot.
Heating- Ac
Heating, ventilation, and air-conditioning (HVAC) are hard to isolate and insulate confronting noise transfer and are excellent audio conduits. The HVAC systems supply heat, cooling, and exchange stale air with fresh air. So, they're rather important and shouldn't be blocked or torn out.
Note: For more than information on HVAC soundproofing, delight meet our articles How to Serenity a Noisy Air Return and How to Quiet a Noisy Furnace Blower.
Make certain the room the furnace unit is in has been soundproofed but has an outside air intake. Build MDF or drywall bulkheads around exposed metal or plastic ducts. Wrap the ducts in foam or line the bulkhead with it. This will limit audio travelling to or from the basement from the residuum of the house.
If y'all can supersede metal ventilation ducts or pipes with insulated flex duct, and then do then. Sound travels in direct lines, and so try to install the flex pipe with curves or bends in it.
Unfortunately, nigh heating ducts are straight so hot air travels easier, which makes them perfect noise channels. If you can, wrap these ducts in audio-visual textile or pigment the inside with sound reducing paint.
If you're installing ventilation pipe or ducts in the basement ceiling, consider vent placement. The further away from the main duct body the vent is the less sound movement. If the room will be loud, like a media or games room, consider installing a dead vent system for the air intake and returns. It volition assistance buffer the sound and reduce racket move.
Electrical – Plumbing
Electrical and plumbing should be completed earlier the ceiling is soundproofed. Brand sure whatever plumbing noise are stock-still and insulated, and set up any leaks or condensation drips. Once the ceiling is noise proofed, y'all don't want to open it upwards again.
Surface or wall mounted lights don't make holes in the noise barrier. Any holes in the ceiling volition leak sound. Electrical boxes for ceiling lights and fans should exist mounted to the joists with a dense vinyl betwixt the wood and electrical box.
Wrap the box with damping material, and use soundproofing caulk to fill the gap around the box and ceiling drywall. Caulk any holes that become through the ceiling to limit noise motility.
Other Ways to Soundproof Your Basement
Soundproof Acoustic Panels
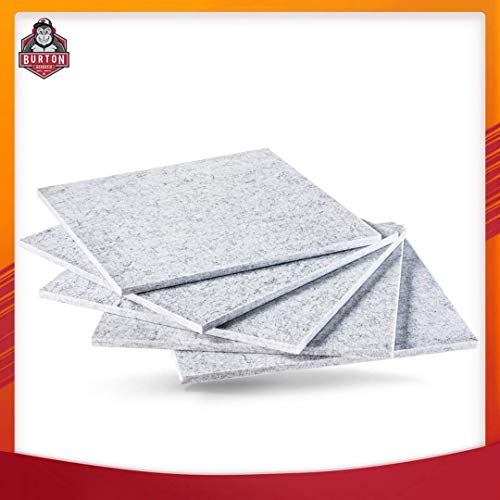 Uber Dense Acoustic Panels are a proven durable solution. With a density of 200 kg/square meter, they have the mass to reduce noise and absorb sound traveling in or out of the basement. Reducing echo, reverberations, flutter and feedback, the noise-proofing tiles also have a loftier NRC rating.
The dense acoustical tiles can be attached to walls or ceilings using acoustic tape or blue-tack. Utilize in home theatres, game rooms, offices or anywhere you demand a dissonance isolation shield. But use tiles where y'all need to amend the audio quality where y'all want. The tiles are also burn down safe, and then will assistance protect your family and habitation.
Acoustic Wood/Fabric Panels
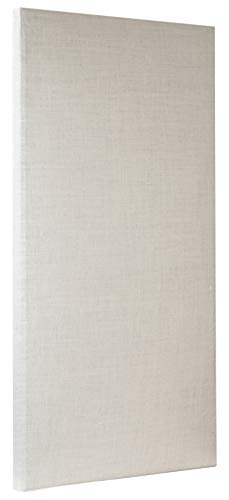 ATS Acoustic Panels are ii"x24"x48" and can exist placed to blot dissonance, reverberation, and reduce echo where needed. The dense wood panels are covered with an acoustic fabric and have an NCR of 1.0.
They tin can be used on the walls of offices, entertainment rooms, and other living spaces. Placed contrary the audio organisation, they will reduce feedback and requite truer sound, and volition reduce repeat in hallways and stairwells.
The material tin can be customized for whatever décor too.
Mass Loaded Vinyl (MLV)
 To control audio in walls and ceilings, mass loaded vinyl (MLV) is a flexible material for wrapping ducts, vents, and around outlets to minimize dissonance transfer. The 1/8" vinyl has an STC rating of 27 and can exist combined with other audio absorbing products to maximize dissonance control.
TMS MLV Soundproofing Bulwark tin can be used to bamboozle audio through walls, doors, and fifty-fifty from floor to floor. Lay it on top of driblet ceiling tiles to improve density and decrease noise motion betwixt floors. Add information technology to the back of acoustic panels to improve sound vibration and amend audio quality even more.
MuteX Soundproof Fabric
 MuteX soundproof material is a 1/iv" thick soundproof material that comes in a ringlet, it isn't a mass loaded vinyl. It has an STC rating of 32 and can be used to isolate HVAC pipes, in ceilings walls, doors and floors to reduce echo, reverberation and ameliorate audio quality.
Information technology tin can be used to wrap ductwork and even the dishwasher to mute vibrational and impact noise. Use under hardwood flooring to help dampen noise, or on sparse walls to do the same. It tin can even be used for defunction to deaden street noise.
Acoustic Sound Foam
Audio-visual squares are tiles fabricated of wedge-shaped fire-resistant loftier-density foam. They are cocky-adhesive and can exist stuck to walls and ceilings wherever needed. Often used in alternating patterns to maximize sound diffusion, and reduce echo, feedback, and reverberation, and absorb mid and high frequency sounds. They work well in media rooms, abode studios and other living areas. They help to improve sound inside a room, and prevent audio transfer to other rooms.
Conclusion
When soundproofing basement ceiling the half dozen factors are important to remember. They volition assistance you improve the audio quality in your basement and the floor to a higher place.
They volition besides make the basement a more enjoyable living space. If you found the article of use, share it with others. Our feedback is always appreciated also!
Source: https://bettersoundproofing.com/soundproofing-basement-ceiling/
0 Response to "whats the best way to soundproof a basement ceiling"
Post a Comment